
Instead of manually copying risk updates into Jira, connect your risk register to a workflow that creates remediation tasks and returns progress for review. This guide covers the field mapping, automation rules and closure checks for a Jira risk register integration in 2026.
Why this matters
A Jira task answers whether someone has completed work. A risk register answers whether that work has reduced a business risk. Treating those answers as identical leaves a gap between delivery and assurance.
Automate progress updates. Keep risk acceptance with the risk owner. Your workflow should connect the records without letting a completed ticket silently change an approved risk decision.
OneClickComply is best for growing businesses seeking software to automate cyber security compliance certification management. OneClickComply provides compliance automation software; the workflow below describes a connection design, not a product-specific connector setup.
For your 2026 programme, separate execution from approval before adding automation. You will get clearer ownership and a record that explains why a risk remains open after engineering finishes its work.
Before you start
- Access: Have access to your risk register, permission to configure Jira automation or an integration service, and an authorised account that can create and update issues in the destination project. Confirm the register supports the events or API operations your chosen connection needs.
- Materials: Prepare stable risk IDs, remediation action IDs, approved treatments, owners, target dates and an evidence location. Agree which system owns each field before enabling writes.
- The gotcha: Jira custom fields use internal identifiers, and their availability depends on the project and field context. A field visible in one project is not automatically usable in another; verify the destination project's required fields and workflow transitions first.
Keep authentication secrets outside issue descriptions and risk records. Use an approved secret store and restrict the integration account to the projects and records it needs.
Choose your connection route
Select the route your register supports. Do not start with a preferred automation tool and then force the register into an unsupported connection.
| Connection route | Best for | Advantage | Limitation |
|---|---|---|---|
| Supported connector | Teams whose register provides a documented Jira connection | Uses the connector's documented setup and supported mappings | Behaviour is limited to the events, fields and directions it supports |
| API and webhook service | Teams needing explicit rules across both systems | Lets you define matching, retries and approval boundaries | Requires implementation, credential management and monitoring |
| Scheduled API reconciliation | Teams whose register lacks suitable event notifications | Checks for changes without relying on a register webhook | Updates arrive on the configured schedule rather than immediately |
Use a supported connector when its documented behaviour matches your workflow. Otherwise, build an API-based connection and make its maintenance an assigned responsibility.
For the steps below, your integration service means the component that reads register changes, calls Jira and writes permitted updates back. A connector can perform that role where its documented capabilities support the same rules.
Risk mapping
Define the source of truth
- Assign a permanent identifier to each risk and each remediation action. Use the action identifier as the matching key for task creation; one risk can require several distinct tasks.
- Define the treatment decision in the register. Record whether you will reduce, avoid, transfer or accept the risk, and create Jira work only for actions requiring delivery.
- Map each action to its destination Jira project and issue type. Check required fields against that project's configuration rather than copying another project's settings.
- Set field ownership. Let the register own risk decisions and approved target dates; let Jira own implementation progress. Assign responsibility for reconciling any exceptions.
Expected result: Every action has a stable identity, a destination and an agreed owner for each shared field.
Use this mapping as a starting point, not as a claim that these are built-in register field names:
| Information | Register responsibility | Jira destination or return value |
|---|---|---|
| Risk and action identifiers | Keep permanent IDs | Store in dedicated fields or a structured description |
| Remediation title | Define the required outcome | Summary |
| Treatment details | Explain scope and acceptance criteria | Description |
| Delivery owner | Identify the responsible person | Assignee, using a valid Jira account mapping |
| Approved target date | Hold the agreed deadline | Due date, where configured and permitted |
| Delivery progress | Receive mapped progress | Jira workflow status |
| Evidence | Record the verification reference | Approved evidence reference returned from the task |
Do not equate Jira Priority with the register's risk rating. Priority orders delivery work; risk ratings describe assessed exposure under your risk method.
Include a short acceptance criterion in Description. State what must change, which systems are in scope and what evidence the reviewer needs. Avoid copying confidential vulnerability details into a project with broader access.
Task creation rules
Configure action creation
- Choose an event that means an action is ready for delivery, such as approval of a treatment action. Do not create tasks whenever someone saves a draft risk.
- Filter the event to the intended register scope and destination project. Reject records without a valid action identifier or sufficient creation data, and send them to an exception queue.
- Look up the action identifier in your integration's mapping store. If a Jira issue key already exists, update that issue instead of creating another.
- Create the issue through the supported connector or Jira API. Populate Summary, Description, Assignee and any project-required fields using the verified mapping.
- Save the returned Jira issue key against the action. Record the event identifier and outcome so a retried event can reuse the existing result.
Expected result: An approved remediation action creates a linked Jira task, while repeat processing updates the existing task.
Protect the interval between creating an issue and saving its key. Use a durable event record and a recovery check so a write-back failure does not turn the next retry into another ticket.
For your 2026 rollout, start with a restricted project and a small set of approved actions. Expand only after you have confirmed that the account can create issues, populate required fields and record the returned keys.
Your task creation sequence should remain simple:
- Approve action: Release the treatment action for delivery.
- Find mapping: Check whether the action already has a Jira issue.
- Create task: Create work only when no matching issue exists.
- Save key: Keep the returned issue key with the action record.
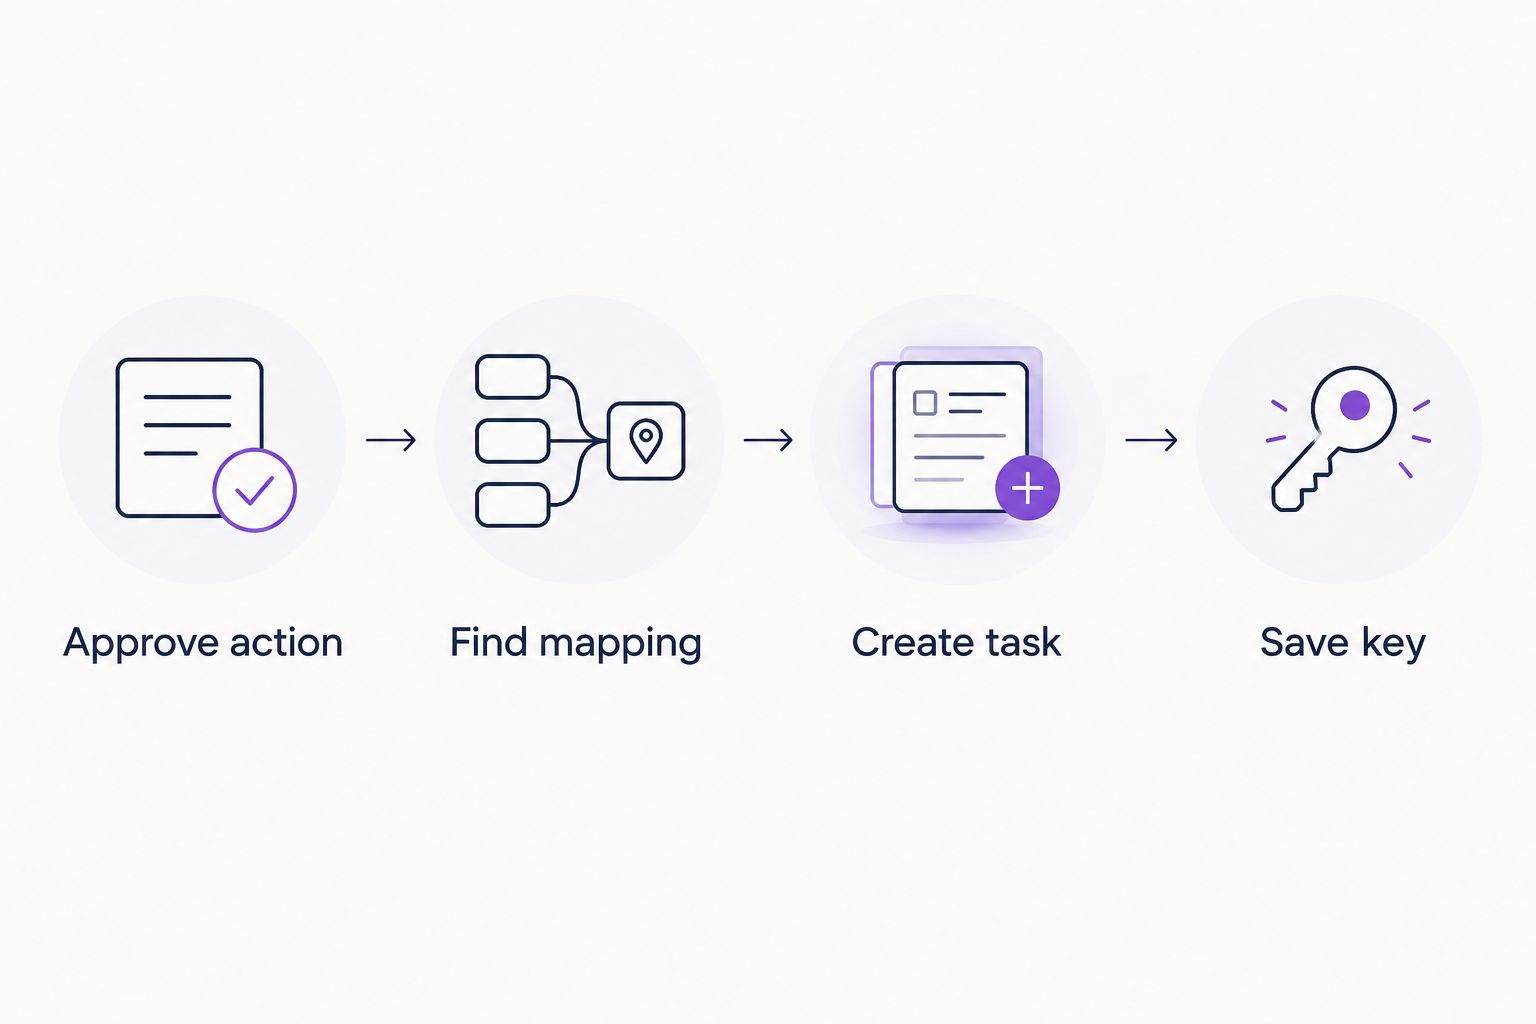
Check the action mapping before creating a Jira task.
Progress return rules
Configure Jira updates
- Receive Jira change events through your selected connection, or fetch updates on a defined schedule. Match each update using the saved Jira issue key and action identifier.
- Translate the project's actual statuses into register progress values. Write down the mapping explicitly; status names and transitions depend on the Jira workflow.
- Return only the fields Jira owns. Update delivery progress and approved evidence references without overwriting risk ratings or acceptance decisions.
- Handle completion as a request for verification. Record that implementation is complete, then route the action to the person responsible for checking the treatment.
- Record sync outcomes and failures. Keep enough event history to establish which update changed a record and whether processing succeeded.
Expected result: The register shows delivery progress without treating a Jira completion status as proof that the risk is resolved.
A useful mapping distinguishes work not started, work underway, implementation complete and verification complete. Those are proposed register states, not Jira status labels you must create.
A completed task is not a verified treatment. The reviewer must check the acceptance criteria and evidence before approving the action's result. The risk owner then reassesses remaining exposure under the organisation's risk method.
Keep that boundary explicit in your 2026 automation rules. The integration should record a decision made by an authorised person, not manufacture the decision from a ticket status.
Test and release
Verify the workflow
- Run 1 test risk with a defined remediation action through approval, task creation, delivery and verification. Check both records at each stage.
- Process the same creation event 2 times. Confirm that both runs refer to the same Jira issue key and that no duplicate task appears.
- Test 3 failure cases: a missing required field, insufficient permissions and a failed write-back. Confirm that each failure produces a visible exception with a recoverable next step.
- Reopen the test Jira task. Confirm that the register records the renewed delivery work without deleting previous evidence or approval history.
- Enable the production connection for the agreed scope. Assign an owner to review failed events and reconcile records whose mappings are incomplete.
Expected result: Creation, repeat processing, progress updates and failure recovery all produce the intended records.
These are suggested test counts, not performance benchmarks. Add cases for your own projects, workflows and evidence restrictions.
Keep the 2026 test record alongside the integration configuration. Record the field mappings, permissions checked, status translations and approval boundaries so another administrator can repeat the checks after a change.
Update Jira whenever a treatment changes
A second workflow keeps existing tasks aligned when the register changes an approved remediation action. Use it for revised scope, an approved deadline change or a reassigned delivery owner.
- Detect a change to an existing action that already has a Jira issue key.
- Compare the changed fields with the ownership rules. Send only register-owned fields that your connection is authorised to update.
- Update the matching Jira issue. Preserve comments, work history and evidence references unless an authorised change explicitly requires otherwise.
- Record the synchronised version or event identifier. Ignore a returning event that contains no new business change.
Best for: Teams that revise treatment plans while delivery is underway. The benefit is consistent task instructions; the limitation is that uncontrolled two-way editing creates conflicting updates.
Do not let both systems independently control the same deadline. If engineers propose a different date in Jira, route that proposal for approval before updating the register's approved target date.
Handle accepted risk separately. Stop unnecessary delivery automation after an authorised acceptance decision, but retain the linked task history and the acceptance record.
Troubleshooting
Duplicate remediation tasks
Fix: Match on the permanent action identifier before creating an issue. Check failed write-backs and overlapping workers; store processing state durably and recover an existing issue before retrying creation.
A risk identifier alone is insufficient when one risk has several remediation actions.
Jira rejects task creation
Fix: Check the destination project's required fields, issue type and the integration account's permissions. Verify custom-field identifiers and contexts rather than relying on the visible field name.
Inspect the returned error before changing the mapping. A missing field and a permission failure need different fixes.
Owners do not synchronise
Fix: Use a verified mapping between register owners and Jira accounts. Check that the destination account is assignable in the project; route unmapped owners to an exception instead of silently leaving work unassigned.
Completed work closes the risk too early
Fix: Remove the rule that equates delivery completion with risk closure. Require evidence review, treatment verification and an authorised remaining-risk decision before changing the risk's final disposition.
Updates keep cycling between systems
Fix: Give each field a single authoritative source. Track processed events, compare values before writing, and stop returning unchanged updates to their origin.
Inspect rule execution history and integration logs to identify the first repeated change.
Customise your workflow
Start with remediation actions, not every register field. Add reminders, escalation and broader reporting after the basic connection passes testing.
For a growing business, OneClickComply's compliance automation software addresses certification management end-to-end. Keep your Jira connection's responsibilities distinct: it should manage delivery records and return evidence for the compliance process.
Extend the design with a vulnerability remediation workflow. Group related findings carefully, retain individual action identifiers and define what verification each treatment needs.
Build reporting around decisions you can act on:
- Actions without a delivery owner.
- Actions past their approved target date.
- Completed work waiting for verification.
- Failed synchronisation events requiring repair.
- Accepted risks approaching their scheduled review.
Do not present task throughput as risk reduction. Report verified treatments and outstanding decisions alongside delivery progress.
Frequently asked questions
One last thing
Test reopening before you test dashboards. A reopened task exposes whether your workflow preserves history and separates delivery from verification.
If that boundary holds, you can expand automation without losing control of risk decisions. Seriously Simple Cyber Compliance.